Got questions? visit the
Toolbotics Community Forum
Need help using Tooli?
Visit the Tooli Help
Art2Gcode help > image2Gcode
About Image2Gcode
Image2Gcode is an application contained within Art2Gcode. Itallows you to import an image file (.jpg or .png file format), adjust the image and apply output settings. These settings are used to create G-Code specifically for your Toolbotics Tooli machine - the code tells Tooli what to do when you run the job.
To launch the application click the Image Engrave button in the toolbar of the Art2Gcode Laser tool screen.

The work space looks like this:
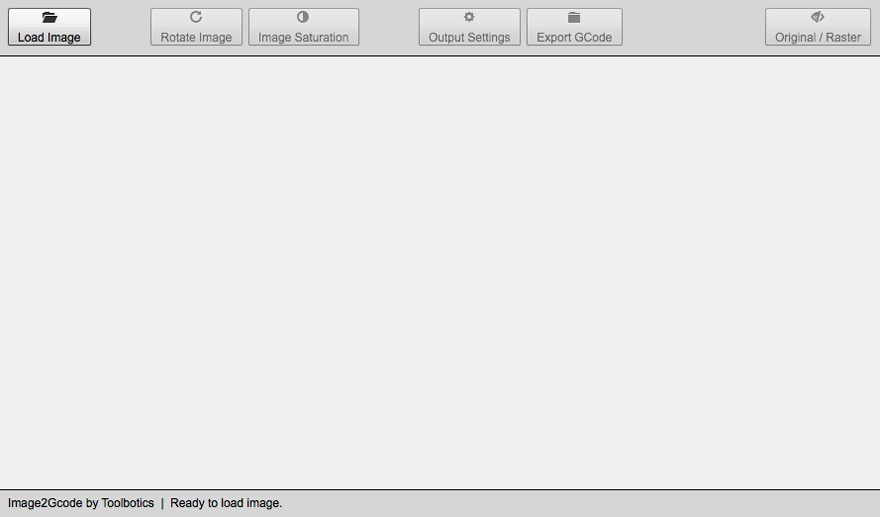
Import an image
Have your image file ready as a JPEG or PNG file.
Click Load Image
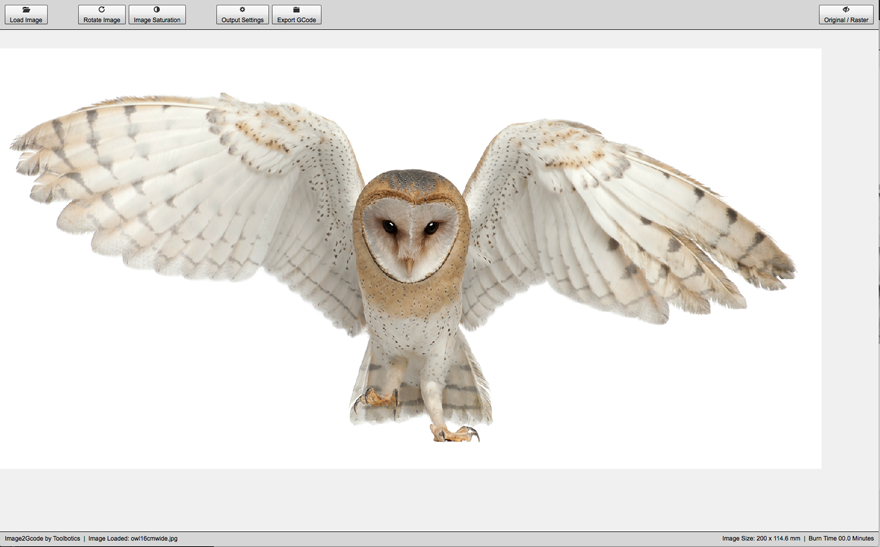
Browse your computer and select the image and click Open, The image will appear in the workspace.
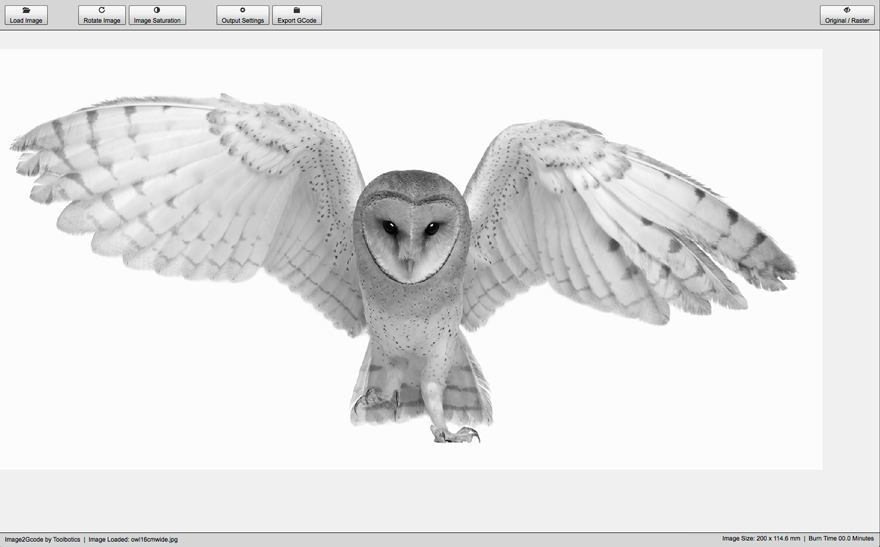
 The image will appear as a black and white image - this is an indicaion as to how your engraving will look with regards to contrast (the amount of black and the amount of white). You can change the view to your original image in colour by clicking the Original/Raster button in the top right hand corner of the workspace. Click again to return to the black and white view (Raster view).
Adjusting an image

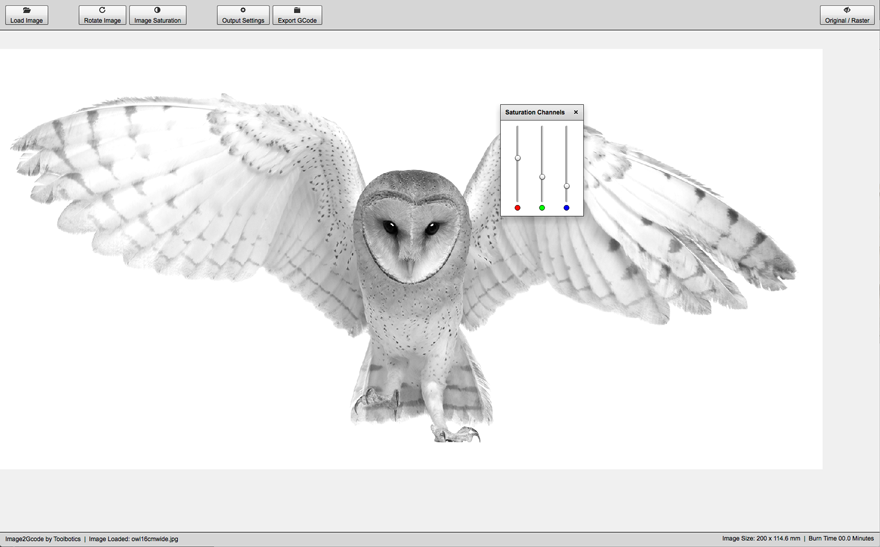
With the workspace set to Raster view (black and white) click Image Sturation. This will show a dialogue box that allows you to adjust the Red, Green and Blue Channels (RGB) to enhance the image. Adjust until you have the desired effect. Then close the dialogue box by click the X in the top right corner of the panel.
Output settings
Once you are happy with your image click Output Settings
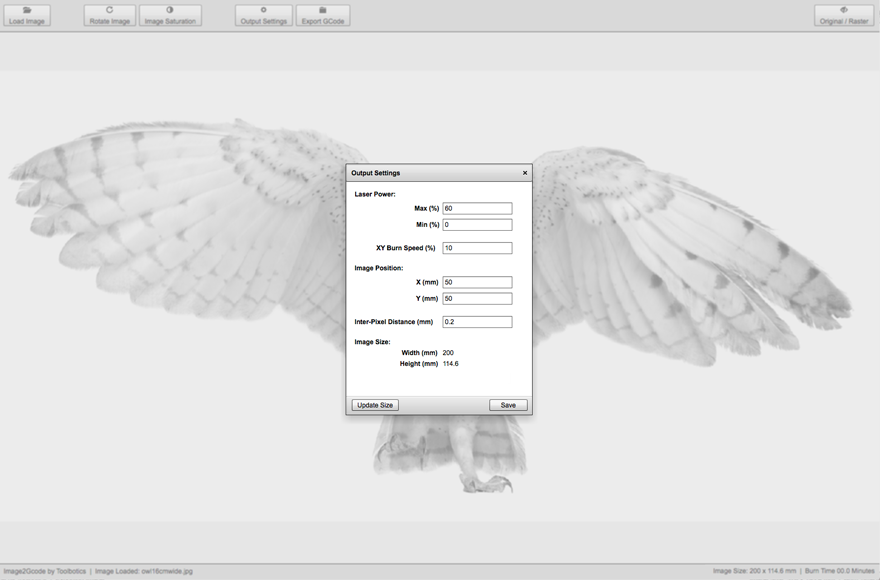
Laser path direction: This is the direction the laser tool-head travels when engraving. You can choose horizontal (side to side), vertical (up and down) or diagonal (45degrees)
Laser power (%): These power settings will control how black the darkest shadows are and how white the highlights are.
XY Burn Speed (%): Speed the laser travels when engraving, this will effect the overall result, the slower the speed the darker the image will be.
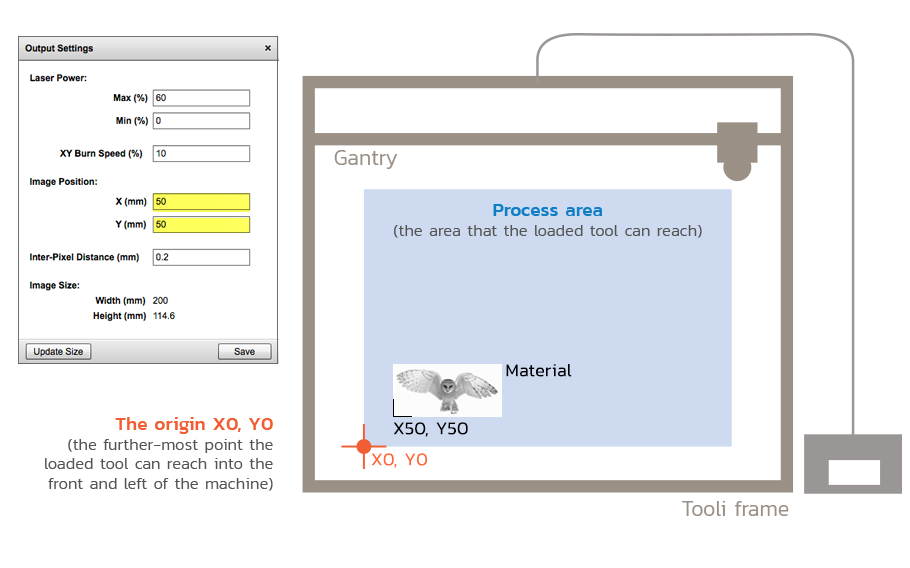
Image position (mm): Position in the machine workspace that engraving will begin - coordinate position of bottom left hand corner of the image.
Inter-pixel Distance (mm): This is the distance between between pixels in your finished engraved image. Changing the inter-pixel distance changes the output size of the image.
Engrave Border (passes): This allows you to engrave a border around the edge of the engraved image, and to control the thickness of the border. Adding a value other than '0' adds a border. The value you enter controls the number passes the laser will make when engraving the border, each pass moves inward the 'inter-pixel distance' - the more passes the thicker the border. For example with an inter-pixel distance setting of 0.2mm a border set at '5' will be 1mm thick.
Image Size: This is the finished size(output size) of the engraving. It is the result of the number of pixels in the imported image multiplied by the space between the pixels (inter-pixel distance). Click Update Size after changing the inter-pixel distance to refresh the image size.
Once you have finalised all these values click Save.
Your output settings will be saved, this status will show in the bar along the bottom of the screen along with the approximate time it will take to run the job.

Export Gcode
Now you are ready to make your code - click Export Gcode.
Save the file to a location on your computer, it will have the file suffix .gslr
If you open it with a text editor it will look something like this:
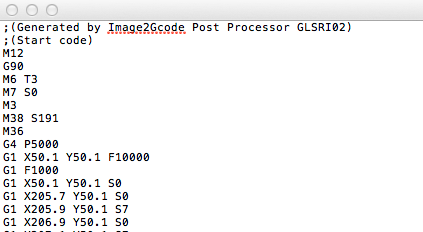
Load this file onto your SD card, then you can load it into Tooli's control box to run the job.
Where to put the material?
In the output setting whatever measurement you input for Image position (mm) will be the further-most front left point of the engraving (the image). Here is an example: